
It was a humid Tuesday afternoon when I finally admitted defeat, tucked my dry ends under a satin scarf, and decided to take down my two-week-old twist-out. My scalp was begging for a wash, my arms were tired from holding a blow dryer, and I needed a style that looked intentional without requiring another three hours in front of the mirror. That was the day I reached for a rat-tail comb and went back to an old standby, a set of neat, classic Bantu knots that I could wear proudly for a few days before untwisting them into the softest, most bouncy heatless curls of my life.
There is something deeply satisfying about a hairstyle that does double duty. Bantu knots are not just a convenient way to stretch your natural hair or achieve defined curls without heat. They are a living piece of history, carrying centuries of cultural significance and resilience. When we style our hair this way, we are participating in a tradition that spans generations. Yet, like many styles designed for textured hair, they can sometimes feel a little intimidating to master on the first try. If your parts are crooked, your knots are lumpy, or your hair feels painfully tight, do not worry. We have all been there. Let us walk through the history, the prep work, and a foolproof method for getting them right.
A Brief Look at the History of Bantu Knots
Before we talk about parting and products, it is important to understand where these knots come from. The term Bantu is actually a broad linguistic and ethnic grouping of people from Central, Southern, and Eastern Africa, encompassing hundreds of different ethnic groups. Historically, the style of sectioning hair into geometric patterns and twisting or binding it close to the scalp was worn by various communities across these regions as a mark of identity, status, age, or marital status.
During the transatlantic slave trade, enslaved African women preserved these styling traditions despite brutal attempts to strip away their culture. The neat, geometric parting and sculptural knots were a testament to ingenuity, geometry, and artistry. Over the decades, the style traveled through the diaspora, evolving into what many people in the West eventually came to call Zulu knots, though the more inclusive and historically grounded term remains Bantu knots. Recognizing this heritage reminds us that our hair routines are tied to a deep, beautiful legacy of endurance and self-expression.
Why Bantu Knots Remain a Natural Hair Staple
In my experience, every natural-hair journey involves a constant search for styles that are genuinely versatile. Bantu knots check so many boxes that it is hard not to love them. Here are a few reasons they have earned a permanent spot in my routine:
- Zero heat damage: You do not need a blow dryer or curling irons to get stunning, defined waves or curls.
- Two looks in one: You can wear the knots themselves as a striking, sculptural protective style for a few days, then unravel them for a completely different curly look.
- Moisture retention: When done correctly on well-moisturized hair, the twisting process helps lock hydration inside the hair cuticle.
- Low maintenance: Once your knots are set, they require very little daily fussing compared to loose styles that are prone to tangling.
Preparing Your Hair for Success
The secret to a great set of Bantu knots actually happens before you ever touch a sectioning comb. If you start on dry, unconditioned hair, your knots will look frizzy, feel stiff, and likely unravel by morning. Take the time to prep your strands properly.
Start with a thorough wash day. Use a gentle, hydrating cleanser followed by a rich deep conditioner to ensure your hair is soft, pliable, and properly moisturized. Rinse with cool water to help seal the cuticle. Once you are out of the shower, apply your favorite leave-in conditioner with good slip to make detangling effortless. Follow this with a lightweight cream or a small amount of oil to seal in that moisture.
If you plan to unravel your knots later for a curly style, stretching your hair slightly beforehand can make a huge difference in avoiding shrinkage and tangles. You can do this by using the tension method with a blow dryer on a cool setting, or simply by putting your damp hair into large braids the night before.
Step-by-Step Guide: How to Do Classic Bantu Knots
Creating clean, long-lasting Bantu knots takes a little bit of patience, but the technique is straightforward once you get the rhythm. Grab a rat-tail comb, some clips to keep loose hair out of your way, and a moisturizing styling cream or gel.
Step 1: Section Your Hair Cleanly
Parting is the foundation of a neat style. Begin on damp or freshly moisturized hair. Use the tail of your comb to create clean, geometric sections. You can go for traditional squares, triangles, or diamonds depending on the look you want. The size of your sections will determine the size of your knots. Smaller sections give you more definition and tighter curls later, while larger sections create looser waves and dry much faster.
Secure each section with a small hair tie or a clip while you work on the rest of your head to keep everything organized.
Step 2: Apply Your Styling Product
Take one section down. Apply a small amount of your styling cream, mousse, or setting gel from roots to ends. Use your fingers or a paddle brush to smooth the product through, ensuring every strand is coated and detangled. This step is crucial for smoothing down frizz and giving your knots a polished finish.
Step 3: Twist the Base Firmly
Hold the base of the section close to your scalp. Begin twisting the hair tightly in one direction, moving from the root down to the ends. You want the twist to be firm, but not so tight that it causes pain or pulls on your scalp. A good rule of thumb is to twist until the hair starts naturally coiling back on itself.
Step 4: Wrap into a Knot
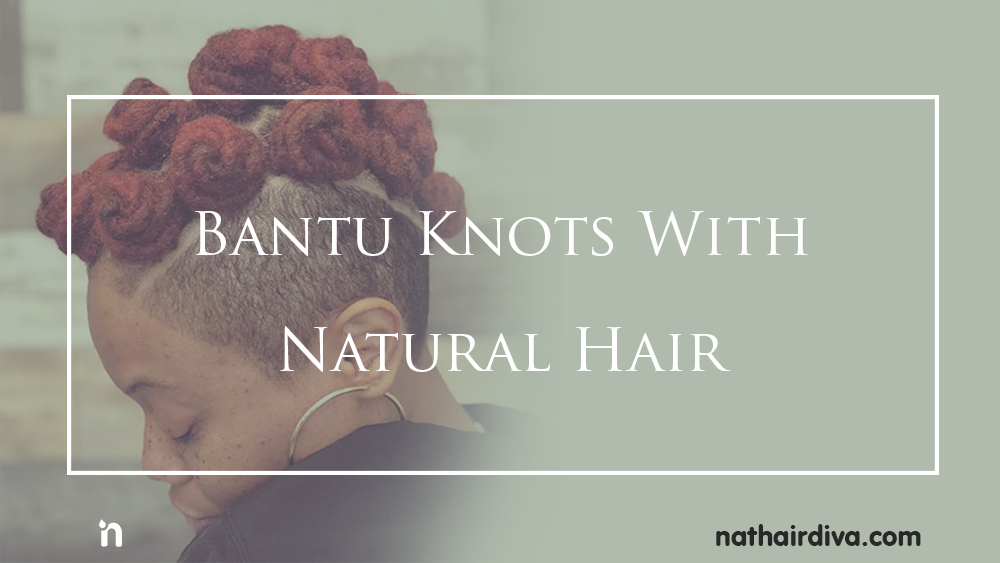
Once the section is completely twisted, wrap the twisted rope of hair around its own base in a circular motion, forming a tight, rosebud-like knot close to the scalp. Tuck the loose ends underneath the base of the knot to secure it. If your hair is on the shorter side or very thick and prone to springing back, you can secure the knot with a small bobby pin or a tiny elastic band.
Repeat this process section by section until your entire head is complete. Take your time, listen to music or a podcast, and enjoy the process.
Troubleshooting Common Bantu Knot Issues
Even with practice, things do not always go according to plan. Here are a few common hiccups and how to handle them:
- My knots keep unraveling: This usually happens when the hair is too dry or the twist was not secured tightly enough at the ends. Make sure you are using a smoothing gel or cream, and tuck your ends deeply under the base. A well-placed bobby pin is your best friend here.
- My hair is still damp the next day: Because Bantu knots wrap the hair tightly upon itself, drying can take a surprisingly long time. If you live in a humid climate or have very dense hair, consider sitting under a hooded dryer for twenty to thirty minutes to speed up the drying process before going to bed.
- My scalp feels too tight: Never force your hair into a knot that pulls painfully at your edges or crown. If it hurts, take it down immediately and re-do the section with less tension. Your hair health and comfort always come first.
Caring for Your Knots While You Sleep
If you are wearing your Bantu knots as a standalone style, nighttime care is pretty simple. Tie your hair down with a satin or silk scarf to prevent friction, frizz, and lint from gathering on your parts. In the morning, smooth down any stray hairs with a little edge control or a light mist of water.
If you are using the knots to create heatless curls, sleep in a satin bonnet or on a satin pillowcase. Letting your hair rub against a standard cotton pillowcase will pull out moisture and create a frizz nightmare before you even get a chance to unravel them.
The Magic of the Take-Down
The moment of truth arrives when your hair is one hundred percent dry and it is time to take the knots down. This is my favorite part of the process, but it requires a gentle touch so you do not disrupt the curl pattern.
Rub a few drops of a lightweight oil, like argan or jojoba, onto your fingertips. This simple step adds shine and prevents frizz as you work. Gently untwist each knot in the opposite direction of how you wrapped it. Resist the urge to pull or yank the hair apart.
Once all the knots are undone, gently separate the individual curls with your fingers to build volume and hide your part lines. Fluff at the roots with an afro pick rather than a fine-toothed comb to keep your curl definition intact. Step back, look in the mirror, and admire what your hands just created.
Wrapping Up
Bantu knots are wonderfully forgiving, deeply historic, and endlessly versatile. Whether you wear them as a bold protective style for a weekend out or take them down for a crown of cascading curls, they are a gorgeous celebration of natural hair texture. Do not stress if your first attempt looks a little messy. Hair styling is a skill built on muscle memory and patience. Have you tried doing Bantu knots lately, or do you have a favorite product combination that never fails? Drop a comment below and share what works for your crown.
Related reading
- Bantu Hair Products: What You Need for Defined Knots
- Are Dreads and Dreadlocks the Same? A Closer Look at the Terms
- Best Protective Styles for Transitioning Hair
Was this helpful?

0

0